This crafting guide is intended for gamers who want to experience the crafting process by themselves, and are looking for the explanation of the mechanics to soften the learning curve. The crafting system in Guild Wars 2 is not entirely unfamiliar, but it is certainly different from what other MMOs or RPGs tend to offer. The specific aspects of the crafting process are discussed at first, and then the information about the mechanics is provided at length..
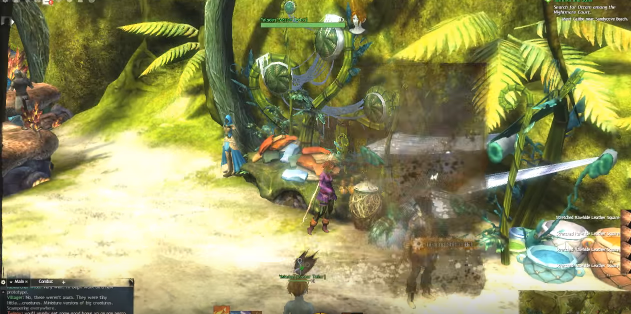
Gathering
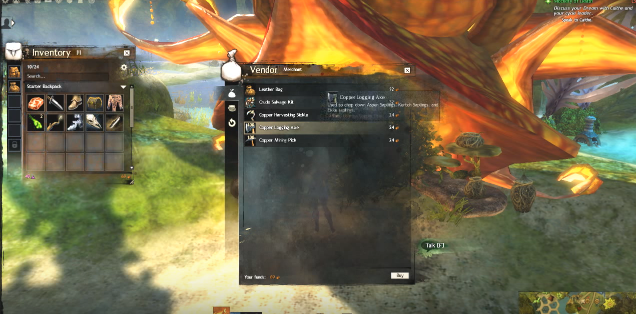
Gathering in Guild Wars 2 is a fairly straightforward process, and unlike many other MMOs and RPGs, there are no specific gathering skills that you need to acquire. All you need is a bunch of appropriate tools which can be bought from NPC vendors found throughout the game. Since gathering does not only yields crafting material, it also earns you experience for gathering achievements, I recommend that everyone should buy appropriate crafting tools appropriate for the zone in which they are in, whether they plan on doing much crafting or not. If you are having a trouble finding NPC tools, you can always find a full selection of gathering tools for sale from any of the crafting discipline trainers.
You will notice in the game that there are several tiers of gathering tools, and I recommend that you use copper tools because they will aid you at many levels. As you will move to higher levels, you will need higher tier tools. These higher tier tools can gather all of the material listed on their tooltip. Once you have bought the tools, you need to equip your character with these tools in order to use them.
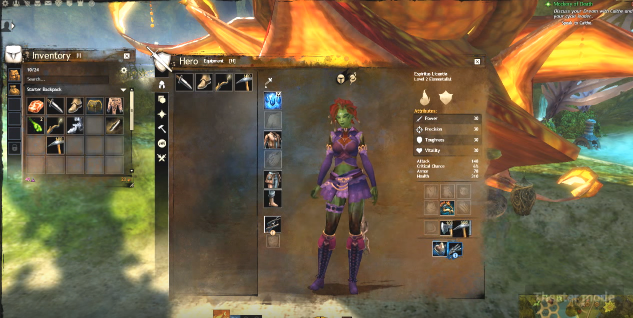
You can do this by double clicking on any of your tool in the inventory, then by right clicking on the desired tool and finally selecting quick from the context menu. There is an alternative method to do that: you can open your character sheet and then you can drag the tool from the inventory to the appropriate tool slot located below the accessory slots on the right side.
Now you are set to begin gathering: anything you can gather is shown on your mini map. The mini-map will also show that whether you are equipped with tools or not. In terms of mechanics, the gathering is very simple; all you have to do is approach the node and either right-click on it or press your interaction hotkey. Also keep that in mind that gathering node is exclusive to each character; it means that you can have ten persons gathering from the same nodes, and all of them getting the same amount of material had they been the only one gathering from it.
Another thing worth mentioning is the salvage kits: you can use these kits to break down weapons, armor, and items specifically labeled as salvage items into raw crafting materials. Salvage kits can be bought from the same NPCs which sell you tools, and you should have one stock in your inventory all the times.
Breaking down armor will typically yield ore from heavy armor, leather from medium armor, and cloth from light armor. Breaking down weapons will give you either ores or wood. You will also often come across items dropped by monsters and these will be labeled as salvage items, so before selling all your junk to the vendor, keep in mind that these are the items where most of your clothes and leather will come from.
The next thing in the gathering category is the fine crafting material: these are things like vials of blood, venom sacs, claws and fangs to name a few. If you loot a monster and get an item with a blue name, it’s a safe bet that this is a fine crafting material.
Storage
Like many MMOs, Guild Wars 2 offers personal inventory space for your character in the form of bags or boxes that can be upgraded as you play the game. It also offers personal bank space to store things that you don’t need to be carrying around all the time. Banks can be found in all of the major cities and are indicated both on your map and on your mini map with a bronze circle. In addition, you can access your bank storage from any crafting station which is extremely helpful if you settle into a particular place to do a bunch of crafting.
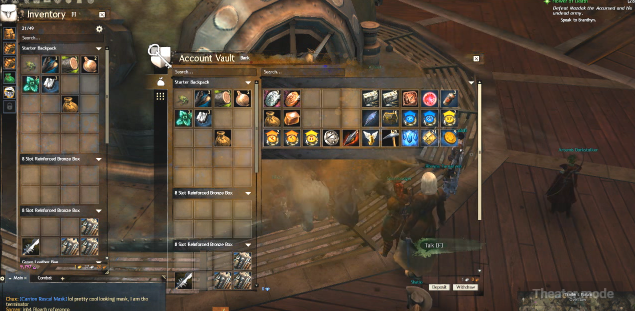
The bank has two interfaces that you can switch between using the tabs on the left side of the window. The top pane is your typical bank storage and you can put pretty much anything in that. The second pane is the collections tab and it provides for your storage needs. The collections tab contains slots for all the raw and refined crafting materials including food, goods, and leather etc.
This feature not only offers free space in your normal bank inventory, interestingly if you have something in your inventory that has a spot in the collections tab, you can send it to the bank from anywhere. You can be neck deep in some fetid swamp somewhere and still be able to send that carrot you just harvested, to the bank just by right-clicking on it and selecting ‘send to collectibles’ in the context menu. Even better, if you open your personal inventory, you will see a gear icon on the top right side, click on that and you will see an option to deposit all collectibles. Clicking on it will send all collectibles currently in your personal inventory to the collections tab in your bank.

It’s a fantastic way to keep your inventory from plugging up while you are in the field doing whatever it is you like to do. There are few things to keep in mind regarding Guild Wars 2 storage options: the first one is that you can increase the number of bags of a given character, and the second is you can also increase the number of general storage tabs in your bank from purchases. Also your bank space, both the general storage tab and the collections pane, is shared by all characters on your account. This can be very convenient at times when trying to pass items between characters, but it means you also have to keep an eye on what you are trying to store and why. You can put soul-bound items in the bank but only the characters that those items are bound to will be allowed to take those items out.
Lastly, when using the bank tabs from crafting stations, it’s important to note that you still need to have items in your personal inventory in order to craft with them. Having the tabs at the crafting station simply means that you can transfer things between your personal inventory and the bank without having to leave the crafting station.
Training and Getting started
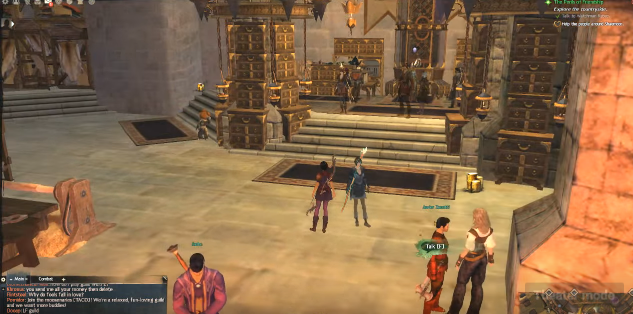
There are eight crafting disciplines in Guild wars 2: weaponsmith, huntsman, and artifice all make weapons; armorsmith, leatherworker, and Tailor all make armor; jewelers make accessories and chefs make food. Learning any discipline is as easy as finding a trainer for that discipline, talking to them and asking to learn the discipline. There is no fee to learn a new crafting discipline: crafting trainers are always found on your crafting stations and crafting stations are always marked on your map. If you want, you can teach all crafting systems to any single character, but only two of them will remain active at one time. In order to swap between them, you have to visit the trainer for the discipline you want to activate; here you will be asked to choose two professions that you want to deactivate. You will also be asked to pay a fee depending on the skill level of the current crafting system. This fee works out to ten copper coins per level, which means that if you want to reactivate a discipline that you have leveled to 400, it will cost you forty silver coins. You should also note that you don’t lose any progress when deactivating a discipline; only you won’t be able to use it until you reactivate it.
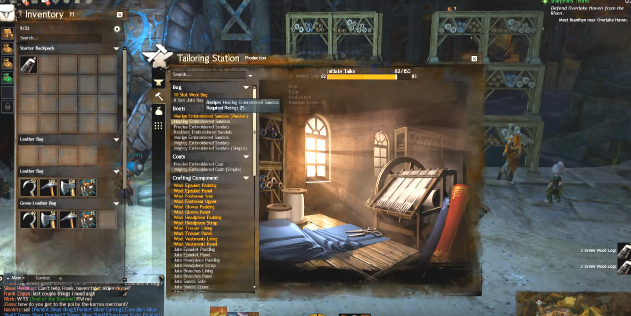
If we eliminate the two bank tabs, there are two tabs in the crafting interface that you can switch between using the icons on the left side of the crafting window. The top tab indicated by the icon is the discovery pane. You will notice that when you select it, you get an inventory list on the left side of the page showing which items currently in your personal inventory could be used to discover a new recipe. If you have a crafting material in your personal inventory that is not showing in the discovery pane inventory list, it means the items cannot be used to discover a new recipe. If the item in the discovery pane inventory appears in red, it means that it can be used to discover a new recipe but you are too low to make the item.
Material Efficiency
Now is time to decide what to make while leveling up a crafting system, and remember that this guide is appropriate for all disciplines except cooking. Every discipline has clearly defined level tiers consisting of 75 level stretches where you’ll be using the same material, for instance, from level zero to 74 Tailor will be using jute cloth, but at level 75, it will switch to wool cloth. And then again when it reaches level 150, it will move to cotton cloth. Within each tier, we can further break things down in three brackets. These brackets consist of 25 level stretches and are defined by the fine crafting materials you are using in order to make finished gear.
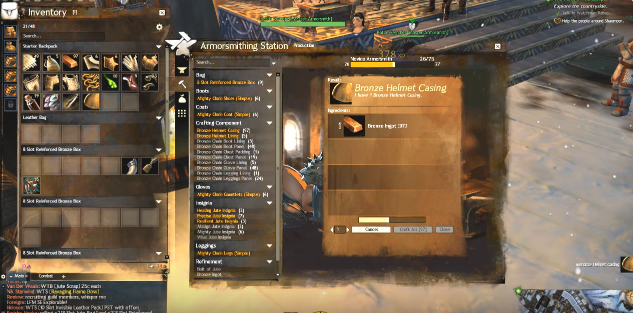
So, based on our understanding of tiers comprised of 75 levels, and brackets within those tiers, we can start to come up with a plan to level up without having to spend more time on farming. By starting out the first bracket of every tier, you will be able to earn experience from refining raw materials. As we know we will have to use these materials later on, therefore, we have to get as much experience as we can from these.
In addition, these are the levels within the tier 1 where you will be able to get experience from the components that you can make.
As a rough guideline, you can safely make about six copies of each component and don’t waste them because you’ll have to use them all up in the process of leveling. Keep in mind that for weapon disciplines, you will get the recipe for the basic dials in the first bracket of every tier, but you don’t necessarily have to be making a ton of dollars to level up on. You will be using wood for weapon components but if you waste all of your planks making a massive pile, all you will be doing is heading back out to gather wood, so use everything in moderation.
During this time, there is no reason that you can’t make gear for yourself or for your friends, but you also need to be very careful about how you are going to use your crafting material because the ones you use in this bracket to make gear are the same as the ones you will be using in the third bracket to get inscriptions in order to continue.
Jeweler Addendum
Jeweler discipline differs slightly from the other disciplines: it tends to follow the same patterns as the weapon and armor disciplines, but it doesn’t use fine crafting material, and it doesn’t start you out with the sample recipes to give you hints as to how things go together. The simplest way to describe jewelers is that like you combine things like hooks, bands, and chains with settings and gems to make finished accessories. The gems serve the same purpose as the fine crafting materials. They define the star that will be on the finished accessory.