Legend’s quest is a quest in which GuildMaster Radimus Erkle sends you to explore and map the Kharazi Jungle. This jungle is situated in the southern part of Karamja. Your job is to establish relations with the jungle natives and bring back a gift to be displayed in the Legend’s Guild. Along the way, you will find mighty foes and underground tunnels, all hiding the dark and daring secrets of the Kharazi Jungle.
Rewards for Completing the Quest:
- 4 Quest points
- 7,650 experience each in four skills of your choice
- Access to the Kharazi Jungle and a vine shortcut into it, requiring 79 Agility.
- Access to the Legends’ Guild
- Radimus Erkle will provide replacement dark daggers
- The ability to wield the dragon SQ shield
- The ability to charge your Skills necklace or Combat bracelet at the Legends’ Guild or the Fountain of Rune.
Quest Requirements:
- 107 Quest points and Completion of the following quests:
- Family Crest
- Heroes’ Quest
- Shilo Village
- Jungle Potion
- Underground Pass
Skills Required to complete the Quest:
- 50 Agility
- 50 Crafting
- 45 Herblore
- 56 Magic
- 52 Mining
- 42 Prayer
- 50 Smithing
- 50 Strength
- 50 Thieving
- 50 Woodcutting
Items required to complete the Quest:
- Charcoal
- Vial of water
- Unpowered orb
- Runes to cast Orb Spell
- Pickaxe
- Rope
- SMELL Runes (1 Soul rune, 1 Mind rune, 1 Earth rune, and 2 Law runes)
- Food
- Armor and a Weapon.
- Lockpick
- Pickaxe
- 2 Gold bars
- Hammer
- Cut sapphire, Cut emerald, Cut ruby, Cut diamond, Cut opal, Cut jade, Cut red topaz
Quest:
In order to start the quest, you need to talk to the guards standing outside the legends guild. They will evaluate you and then send you through the gates to Radimus Erkle to get your assignment. Erkle will give you an incomplete map of Kharazi Jungle and tell you to complete it. In addition to that, he will also tell you to befriend the Jungle natives to get them to give you a “Totem Pole” which he wants to display inside the guild. He will give you some notes to take alongside you.
It is a good idea to grab the free papyrus and machete on your way out, you are going to need these later in the game.
You can get to the Jungle by first going to Ardougne and then taking a boat to Brimhaven. Once there, take Hajedy’s cart to Shilo Village.
Alternatively, you can use fairy rings to get to the jungle. It is a good idea to wear a ring of wealth or a charged amulet of glory throughout the quest to give yourself a handy teleport very close to a bank.
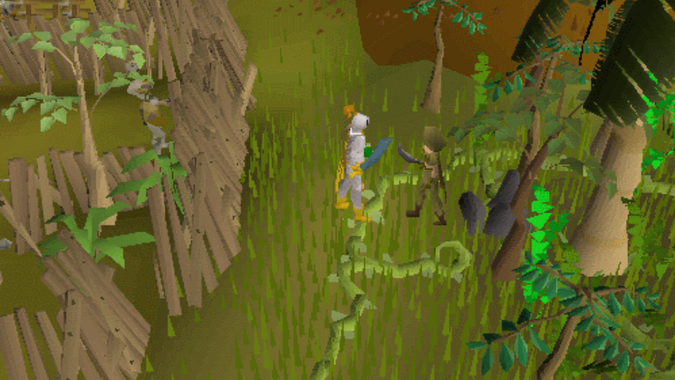
Once there, go to any entrance of the jungle and talk to a forester along the jungle wall. He will ask you to show him “something impressive” in exchange for a special item.

You now need to cut your way through the Jungle wall to get inside, Use your machete and your hatchet.
After getting inside the Jungle, you should start mapping it down using papyrus and charcoal. To map an area, right click on the Radimus Notes and then select “Complete”.
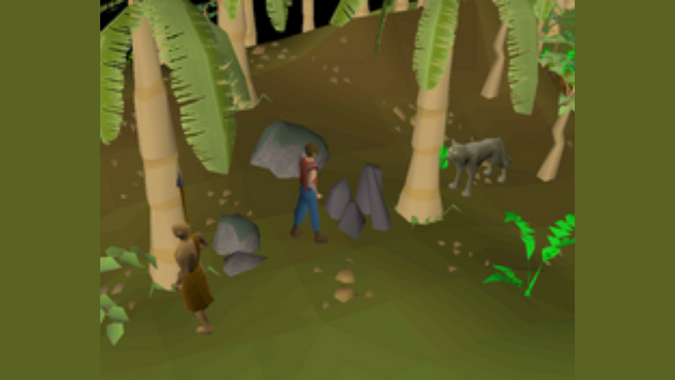
You may encounter the following enemies inside the jungle. Jungle Wolves (level 64), Jungle Savages (level 90) and oomlie birds (level 46). Some of them can attack unprovoked so its wise to be on the lookout.
Now that your Radimus notes are complete, go talk to a forester again. When he asks for “Something Impressive”, hand him the completed notes. He will give you a bull roarer in exchange.
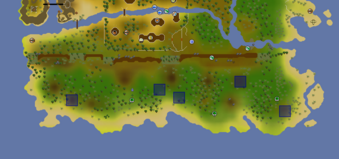
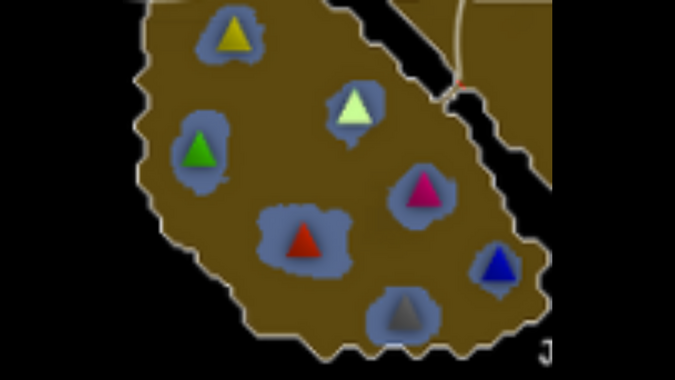
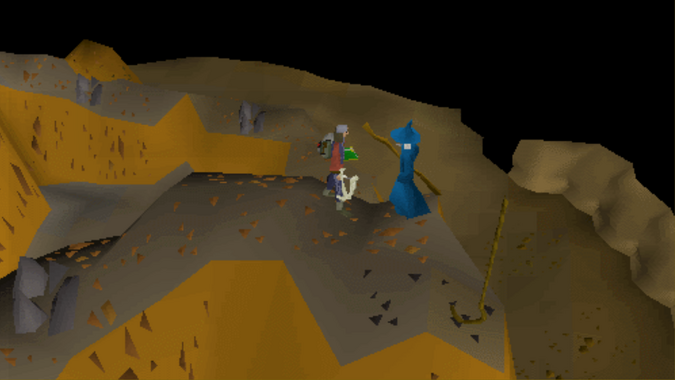
You now need to go the totem pole situated east of the water pool. All the totem pole locations in the Jungle are marked by blue squares on the map.
Once there, swing your bull roarer to call a local named Gujuo. He will ask you to help him free his tribe’s shaman, Ungadulu, who are trapped inside his cave.
The Cave:
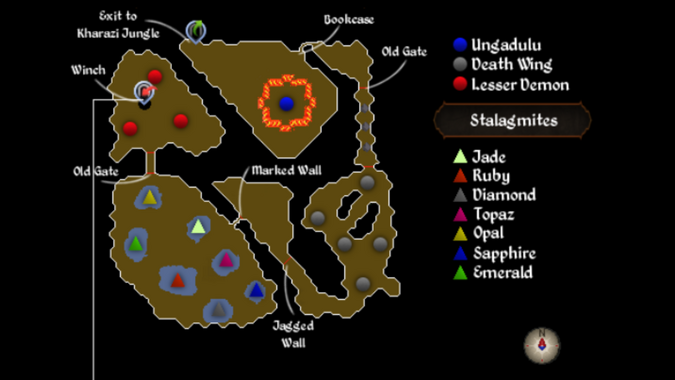
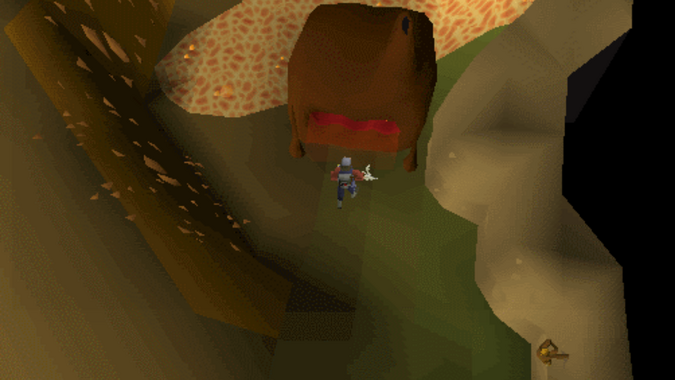
From now onwards, you can call Gujuo by using your bull roarer from anywhere in the forest. You now need to go to the northwestern edge of the jungle where you will find some rocks arranged in a triangle. You can squeeze through these rocks to climb down the cave.

You will then reach the first level of the cave. The cave looks like this.
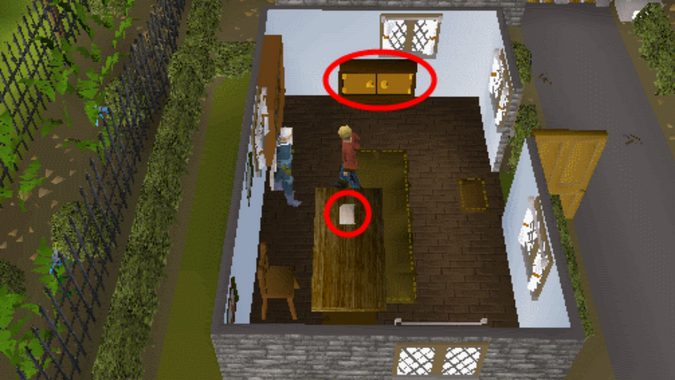
In the cave, you will see an octagonal firewall and a Ungadulu trapped behind it. Investigate the flames of the firewall and talk to Ungadulu. He will tell you to get Holy water to douse the flames. You then have to inspect several items in the cave including the table which has a scribbled note, the bed which has the scrumpled note and the crate which has the scrawled note. Gather these notes and go back outside the cave to call Gujuo. Tell him that you need some holy water to douse the flames. He will tell you that only a vessel made of the metal of sun can hold the holy water. Ask him “what kind of vessel?” . He will then draw you a sketch of the vessel.
Gold Vessel:
You now need to take this sketch along with a hammer and 2 gold bars to an anvil. The closest anvil you will find is in Tai Bwo Wannai Village. You might have to try a couple of times so make sure to bring some spare gold bars as each failed attempt consumes two.
After getting the vessel, go back to the Jungle and call Gujuo again to get your vessel enchanted. You need at least 42 prayer points for this step.
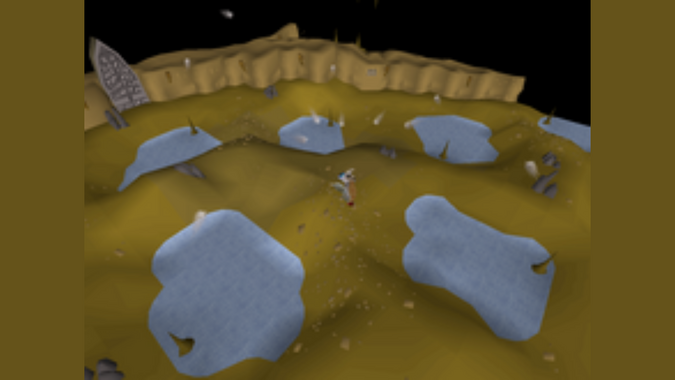
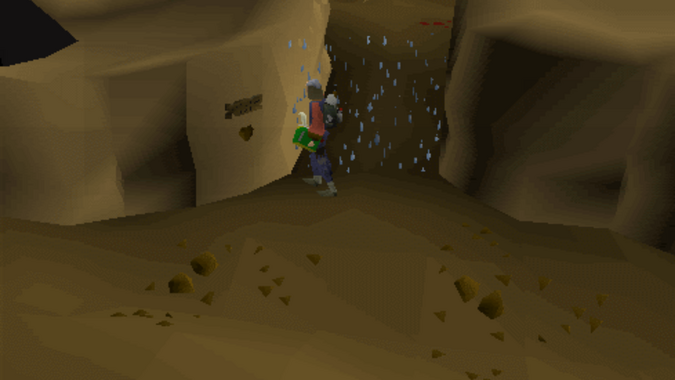
Once enchanted, take your vessel to the Sacred Water Pool located in the middle of the jungle. You wont be able to reach the water directly and will need to use a hollow reed to siphon the water into your vessel. You can use your machete on the tall reeds located by the side of the pool to make a hollow reed.

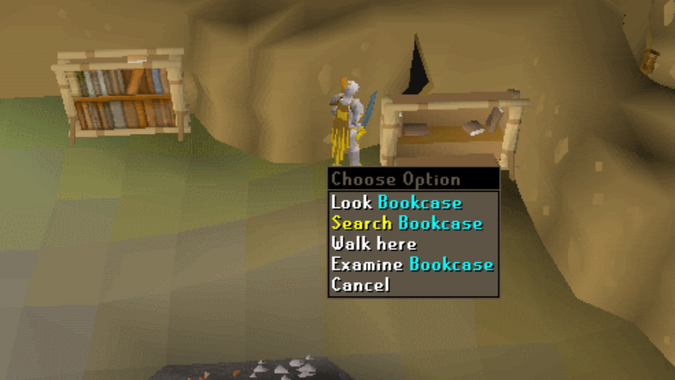
Now go back into the cave and use the holy water on the firewall. You then need to search the desk to find the Shaman’s Tome. Shaman’s tone reveals the poor mental condition of Ungadulu due to being possessed by the demon. You are going to have to come back to liberate him.
You now need to squeeze through a crevice hidden behind the easternmost bookcase. Searching the bookcase will reveal the crevice.
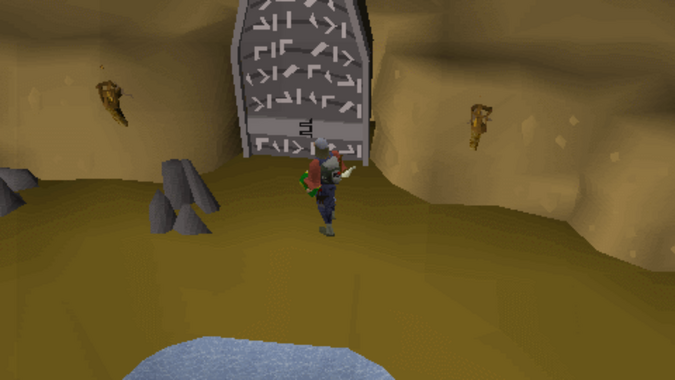
Ancient Gate 1:
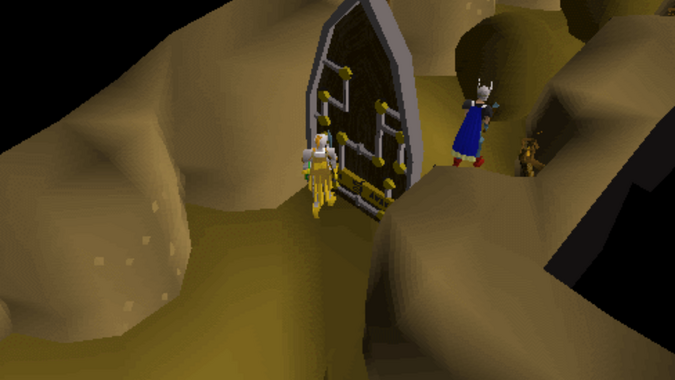
As you walk forward, you will see an ancient gate. You have to open the gate using your lockpick. You may have to try a couple of times before you succeed.
Once opened, go through this gate and then mine the three boulders out of your way using a pickaxe.
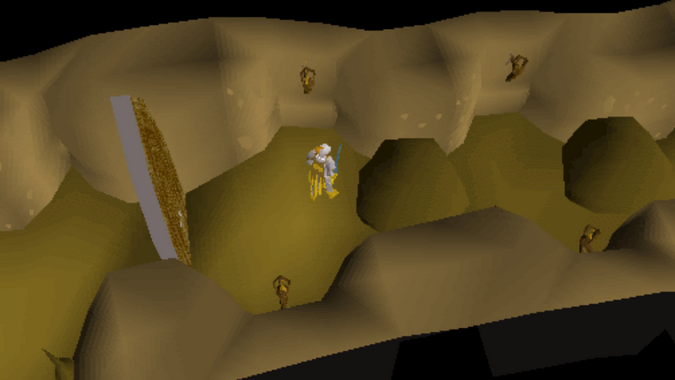
Ancient Gate 2:

After the boulders, you will come across another ancient gate. You can use your strength to push through this gate (level 50 strength required).
There are level 83 Death Wings on the other side of the gate. It is wise to have Protect from Melee onboard in case they attack you.
Now go south into the cave of Death Wings. Continue southwest and then northwest until you see the Jagged Wall agility obstacle. Jump over the wall to complete the obstacle.
Along the west side of the corridor, you will find a place where there are markings on the wall.
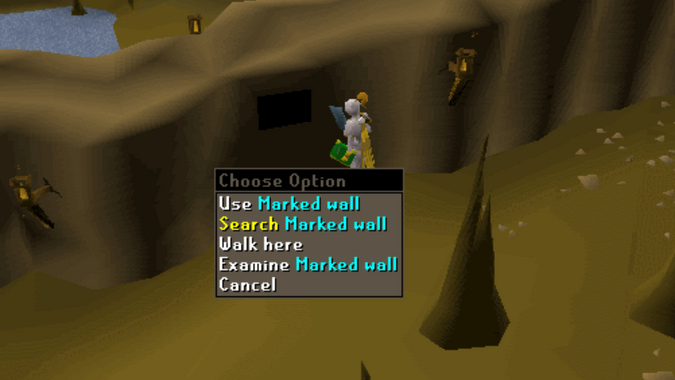
Search the marked wall and you will get a riddle telling you the correct order to insert the runes in order to unlock the passage. The runes should be in the following order:
1 Soul Rune
1 Mind Rune
1 Earth Rune
2 Law Runes
Notice the “Word of basic sense” in the riddle is “SMELL”.
Use the runes in the right order and a door will appear. Go through the door to find your next puzzle.
Binding book:
Once inside, you’ll see stalagmites sitting in a total of seven pools of water. The correct order to fit the gems in these stalagmites can be seen below.

Once all of them are in, the binding book will appear after a brief light show. Take the binding book and teleport out of there.
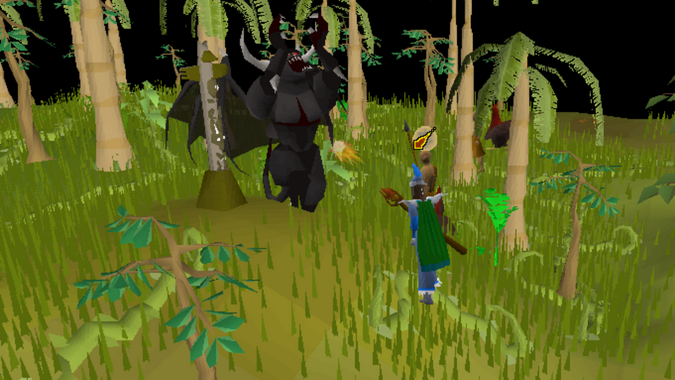
Defeating Nezikchened:
Head back to the first level of the cave and use your holy water on the firewall to get through the flames without damage. Now use your binding book on Ungadulu to release the demon Nezikchened. Make sure not to attack or talk to Ungadulu or he will kick you out.
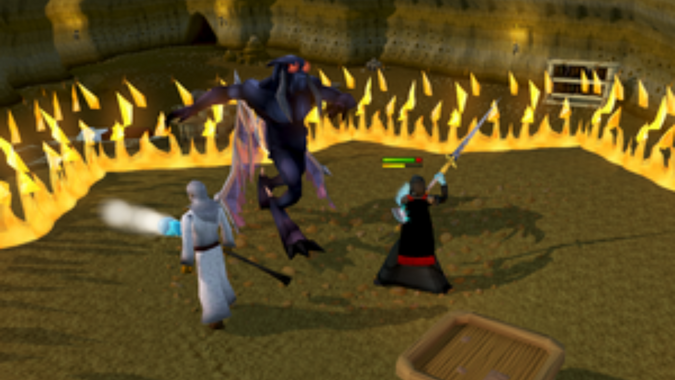
Nezikchened is level 187 and it is recommended to bring Arclight, Silverlight or Darklight in addition to a high tier weapon to fight him. It is also strongly advised to bring several pots of prayers as Nezikchened drains almost 90% of your prayer right in the beginning of the fight. Another thing to keep in mind is that he casts a Fire Blast just before dying, make sure your HP is up enough to survive this last attack.
Once Nezikchened is successfully defeated, Ungadulu will thank you and give you some Yommi tree seeds. Ask him how to get out and he will cast a spell to protect you from the flames. You can then exit the cave.
Bravery potion:
Go back to the Pure water pool to get your gold vessel refilled. Use the holy water on the yommi seeds to germinate them. This will empty your vessel. When you go back to refill it, you will find the water pool dry. Use you bull roarer to consult Gujuo. He will tell you to go to the underground source of the holy water to find out the problem. He will also tell you to get a bravery potion before going to the underground dark tunnel.
To make the bravery potion, you need Snake Weed and Ardrigal. The locations for getting Snake weed and Ardrigal are marked with Teal and Red respectively.
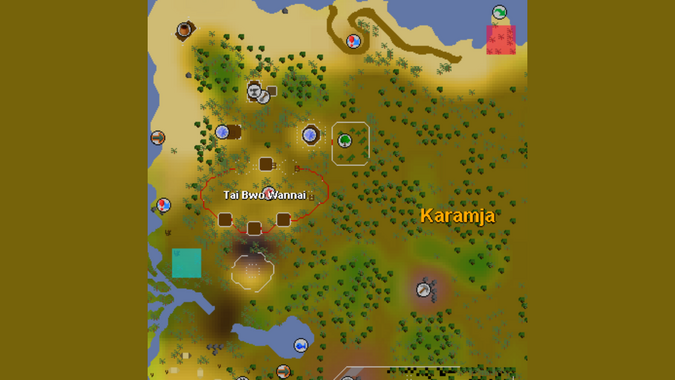
Snake weed can be found in the West side of Tai Bwo Winnai Village by searching the vines near the water.
Ardrigal can be found by searching the Palm tress in the northeast part of the village near the Harpie Bug Swarms.

Clean both of these herbs and mix the two into the vial of water to make the bravery potion.
Ancient Gate 3:
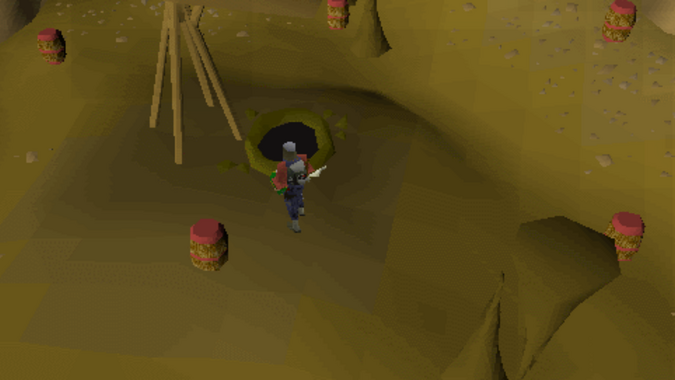
You need to go back in the cave all the way to where you got the binding book. There, you will find another Ancient gate on the north wall. Cast any Charge Orb spell on it to enter.
You will then find yourself in a room full of barrels. There is a winch in the room that you should use your rope on. Now drink your Bravery Potion and go down the winch.
Dark Tunnel:
Now climb down to the bottom very carefully as falling off can cause 40+ damage here. On your way down, you will find a blue wizard hat to the right of the ladder and you can pick it up to summon the spirit of Viyeldi. He will recite a poem about what is to come in the future.
Wandering the cave are three undead warriors named Ranalph Devere who is level 92, San Tojalon who is level 106 and Irvig Senay who is level 100. You have to fight and defeat them individually in order to advance further. Now go the northeast corner and forge your crystal parts on the lava furnace to make a heart shaped crystal.
Now go to the center of the cave which looks like the head of the dragon on the mini-map. Place your crystal on a mossy rock there. The crystal will start to glow.

Now take this glowing crystal to the shimmering field in the southeast corner of the cave where you will find a heart shaped recess. Place your crystal in the recess and pass through the wall.
The Water Source:
There are three lesser demons on the other side of the wall. Past them to the west is the Holy Water Source. You will find out that, the reason the Pure water pool became dry is because a boulder is blocking the water flow. Push the boulder to restore the water flow.

As soon as you start pushing the boulder, a ghost named Echned Zekin will appear before you. He is an anagram of Nezikchened and will give you a dark dagger to help him murder the spirit of Viyeldi. Although you can choose to spare Viyeldi, you still need the dagger to proceed with the quest.
You can now continue the quest using one of the two paths. Lets go through them one by one.
The Short Path:
Go back to where you encountered the blue wizard hat. Pick the blue hat and kill the spirit of Viyeldi with the dagger. Now go back to the boulder. Tell Echned Zekin that you killed Viyeldi (it is advised to drink your prayer potions and safespot him before talking to him). He will then reveal himself to be Nezikchened and attack you. After finishing him off, push the boulder out of the way of the water’s flow.
The Long Path:
If you don’t want to kill the spirit of Viyeldi, you can go to the beginning of the cave to the firewall. Ungadulu’s magic will allow you to safely pass through the wall. You should then use the dark dagger on Ungadulu. He will recognize the evil in the dagger and give you a Holy Force Spell Card revealing the ghost’s true identity. Now go to the bank to get food, another unpowered orb and runes.
Now head back to the bottom of the cave to fight Nezikchened. Safespot him by choosing the southern boulder and then left click on the Holy Force Spell Card to cast the spell. Your prayer will be halved as soon as the battle begins and Nezikchened will switch between magic and melee attacks.
After defeating him, push the boulder to restore the water’s flow. You will need to push several times from different angles to move it far enough.
Creating the Yommi Totem:
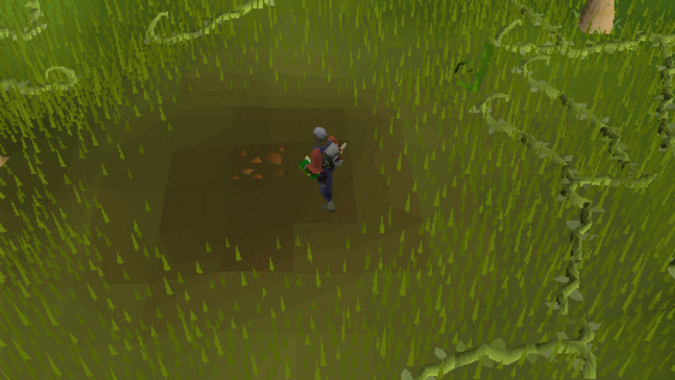
Go back to the restored Pure Water Pool. Fill your gold vessel with the holy water and use it on the yommi seeds to germinate them. Now find a fertile patch of soil marked brown on the map.

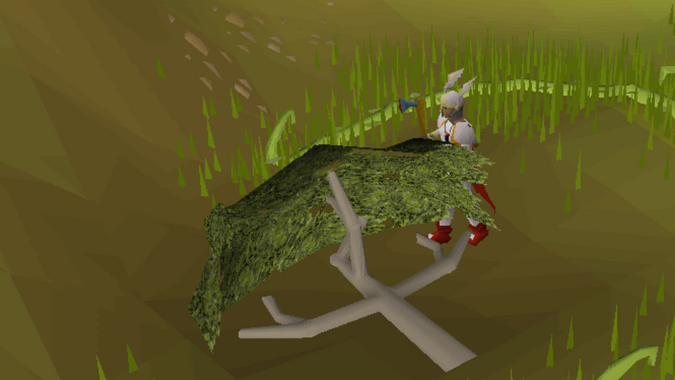
Plant the seeds in the soil and wait for the tree to grow. When the tree reaches the second stage, use your gold vessel to water it. This will make it an adult yommi tree. Now quickly use your axe on it to chop off all the branches and shape it into an Yommi totem. If you wait too long, it will rot.
Note: For ironmen who are below level 75 Woodcutting, you can allow the Yommi trees to die and chop them down to get magic logs. This is one of the few ways in all of OSRS that you can get magic logs without having the level to cut down magic trees.
The Last Ride:
It is advised to get yourself equipped with the best armor and weapons, prayer potions, super set potions and high level food before getting into the final encounter with Nezikchened. Also make sure your gold vessel is filled with holy water. You also need to find an old dark totem. You can find one just north-west of the pool of pure water. Once you spot one, drink your Super Set potions and turn on Protect from melee before replacing the totem you made in the previous step with this old totem.
Shortly after replacing your yommi totem, Nezikchened will spawn and render you immobile while saying his dialogue.
If you chose the short path previously, Nezikchened will summon the three undead warriors one by one and you will have to kill them again. However if you chose the Long path, he wont be able to summon then as Viyeldi will be alive and protecting the warriors.
Needless to say your prayer is gone as soon as the battle starts, so the prayer potions are certainly going to come in handy. Nezikchened’s magic and melee are much more effective in this last battle and you can only kill him using Ranged, Halbred or Magic from between the trees.
Once you have successfully defeated Nezikchened the third time, replace the totem and use your bull roarer to call Gujuo. He will then appear to thank you and reward you with a Gold Totem Pole.
Now take the gold totem and the completed Radimus notes back to Radimus Erkle’s Guild office. Meet him in the Legends Guild lobby and you will be able to choose 4 skills to gain experience in. The quest officially ends when you claim the experience rewards.
More OSRS Quests: